Reselling
We generally allow reselling of Luna Node Dynamic virtual machine services. To avoid account issues, please contact us and request to have your account marked as reseller; in your request, include the domain name where you will be selling services from. Note that in cases where we notice a large amount abuse from a single reseller customer, that customer may be terminated; this shouldn't be a problem if you verify new orders.
We offer a powerful API that should have everything you need to create your own panel for reselling. For smaller businesses, we also have a ready-made module for the popular WHMCS billing platform; see below for more information on this module. Warning: we do not provide any guarantees for security of third party software or modules that we implement that interact with such software.
lndynamic module for WHMCS
The module code is available at https://lunanode.com/downloads/lndynamic_whmcs.zip. The remainder of this section will cover installation instructions, assuming you have already installed WHMCS.
- Upload lndynamic_whmcs.zip to your web server and extract to the /path/to/whmcs/modules/servers/ directory. This should create a new directory, /path/to/whmcs/modules/servers/lndynamic/.
- Go to your Luna Node Dynamic account and create a new API key. You may choose to enter restrictions if desired. Save the API ID and API key for later.
- Create a new product/service, with product type "Dedicated/VPS server". Under Module Settings, select "Lndynamic" for the module name. After saving changes, more fields will show up. Enter your API ID and API key from previous step. Then select a plan name for this product; you can leave the plan_id field blank.
- Under "Custom Fields", add a new field with Field Name set to "vmid", Field Type as "Text Box", and check the "Admin Only" box. This will be used to save the backend VM ID for each service on this WHMCS product. Save the changes.
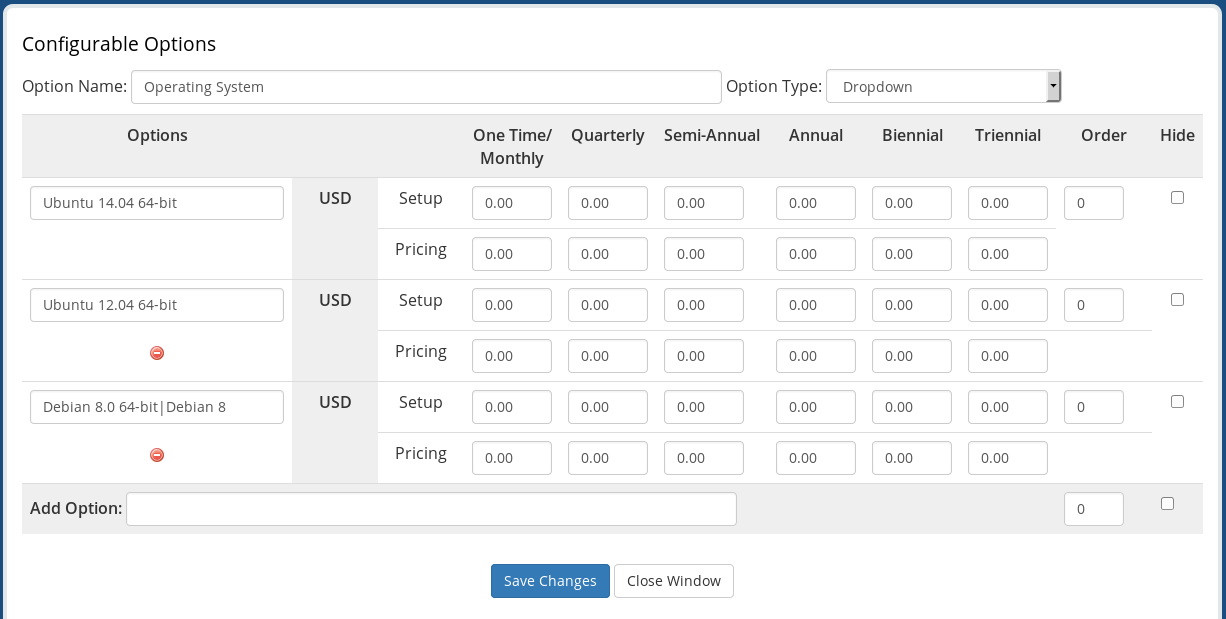
- Go to Setup -> Products/Services -> Configurable Options and create a new group for lndynamic (you can name it "lndynamic config options"). Inside the group, select all products using the Lndynamic module. Add a new configurable option with Option Name set to "Operating System" (case sensitive). Each option will be an operating system that the user can choose when purchasing a VM for the first time; for each option value, use "ID|NAME" where ID is the image ID and NAME is what you want it to show up as. Click here for an example.
The module supports start/stop/reboot VM, VNC, reinstallation, and more.